If you’ve been keeping track of my instagram account and/or Facebook page these past few months, you might have already seen some glimpses of what’s currently a-brewing and a-groing in my kitchen, but in case it escaped your notice, or for those who are keen to know a bit more about the culinary experiments I’ve been conducting since the start of this year, here’s a quick introduction.
Fermentation education
The term “fermented food” covers a broad range of ingredients. In fact, a lot of the things we humans eat and drink, including some of the tastiest (!), are fermented in some way or another: tea, coffee, alcoholic beverages, cheese, butter, yoghurt, sourdough, vinegar, chocolate, miso, tempeh, kimchi, pickles and more. I’ve long been fascinated by the way we can work together with micro-organisms to make amazing-tasting foods, but feeling I first needed a little more knowledge before I had the confidence to get cracking, I signed myself up for a two-day course in January. During this course on “food fermentation for professionals” we were taught how to safely produce a range of fermented foods, and as soon as I’d absorbed the necessary knowledge and obtained the necessary tools, it was time for me to carry on this fermentation education in my own kitchen.
What I’ve been up to
So far, I’ve mostly been focusing on two things: kombucha – which I’ll talk about in part 2 of this series – and lacto-fermented vegetables. In this blogpost I’ll be discussing the basics of lacto-fermentation and show you some examples of what I have made so far. Not detailed enough for you? Don’t worry. In the future I’ll definitely post some of my favourite recipes, including more elaborate step-by-step guides.
-
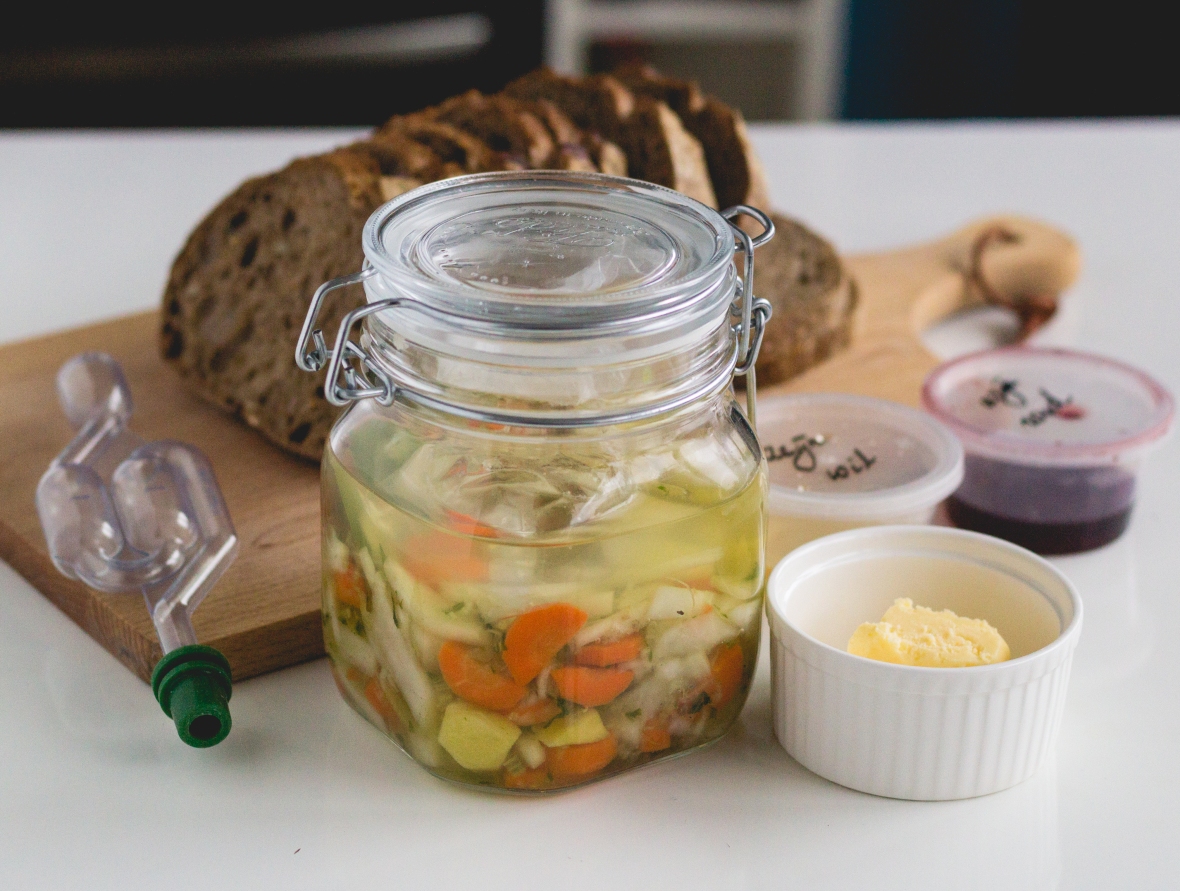
Two vinegar starters, homemade butter and, last but not least, my first batch of pickles: daikon radish, carrot, bok choy, ginger, coriander seeds, peppercorns, green chili, fennel seeds and bay leaf.
Lacto-fermented vegetables
To lacto-ferment your veggies is essentially to pickle them the old-fashioned way, using salt and the lactic acid bacteria naturally present in vegetables. While you have probably heard of kimchi or sauerkraut, nowadays most other pickled vegetables are usually pickled in vinegar. While this latter method might be quick and reliable, and also fairly delicious, it lacks the probiotic qualities and complex, layered taste of the salt-pickled alternative.
How does it work?
The salt inhibits the growth of unwanted bacteria, allowing the lactic acid bacteria (which are not affected by salt) to take over. These little critters subsequently break down sugars and turn them into lactic acid: in other words, they make your veggies taste sour and tangy. This decreased pH, or increased acidity, means the vegetables are now even more protected against bad bacteria, i.e. spoilage.
Vegetables like cabbage lend themselves well to shredding and kneading: the salt will draw out moisture, which becomes the pickling liquid. If, on the other hand, you prefer a chunky pickle: with larger pieces of carrot, for example, or pickled gherkins, you submerge your ingredients of choice in a salt water solution.
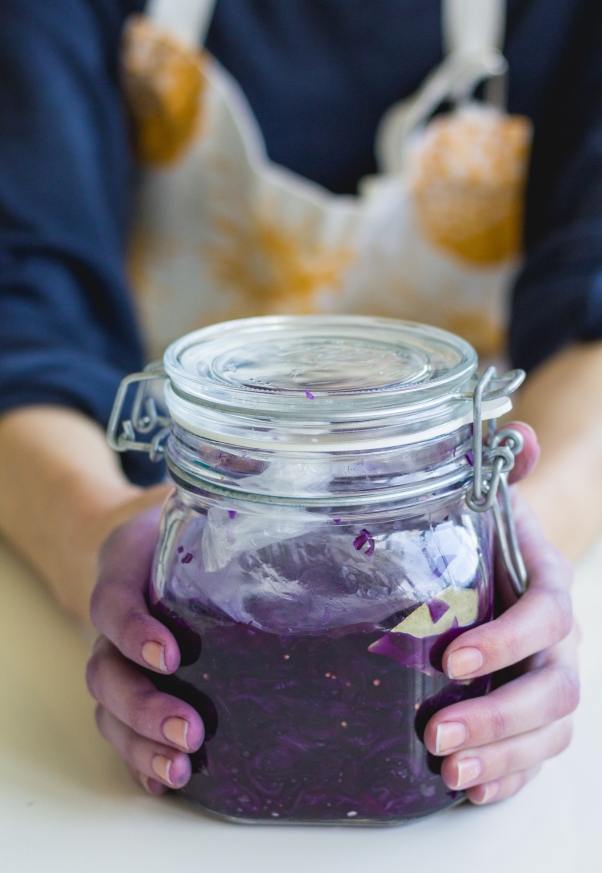
Third batch of pickles: a red cabbage sauerkraut with ginger, mustard seeds, peppercorns, bay leaf and fennel seeds. Cabbage requires vigorous kneading, so purple hands were inevitable.
Basic safety rules
I’m planning to make a more elaborate, step by step guide, but if you can’t wait to get started, here are a few important safety rules to keep in mind.
- For shredded vegetables: Use 2-3% salt, or 20-30g per kilo
- For whole (and or pieces of) vegetables: use a 5% brine solution of 5% salt or 50g per liter water.
- Keep vegetables submerged in liquid at all times to prevent mould forming on the surface. Weigh down with a little sandwhich bag filled with brine solution.
- Use pressure-resistant jars, such as clip top kilner jars, or a jar with a waterlock – glass jars with regular lids may explode!
- Ferment at room temperature away from direct sunlight.
Be creative!
As long as you’ve got the basics down, you can experiment all you want with spices and flavourings, and with fermenting times. As time goes by, your pickles will become softer in texture and more intense, complex and sour in taste. Taste after two weeks with a clean fork (you don’t want to introduce additional bacteria!) and every week after that until you’re happy with the result. Once you are, put the jar in the fridge to stop the fermentation.
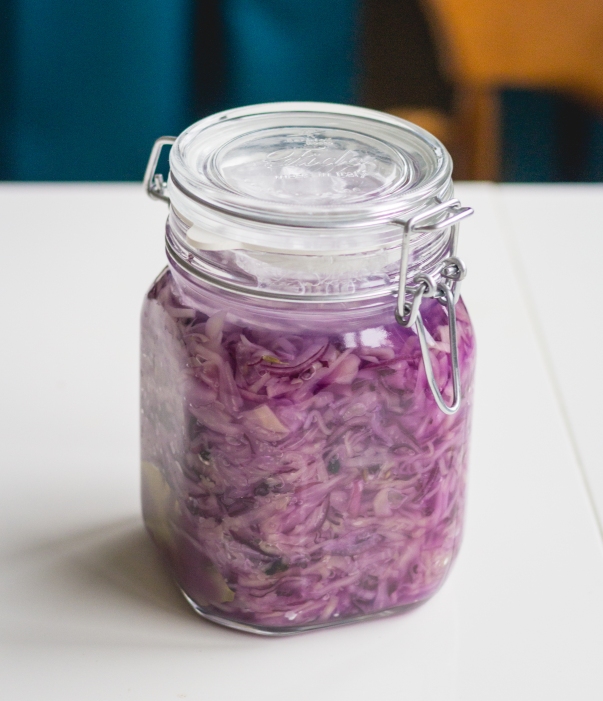
Fourth batch: a white cabbage sauerkraut with a little bit of red cabbage, ginger, garlic, red onion, dried bird’s eye chillies, peppercorns, bay leaf and cumin seeds.
———————————————————————————————————————————-
Welcome to Cuisine d’Eli. My name is Elizabeth and I’m a personal chef and caterer with a passion for sustainable food. I’m based in Utrecht, the Netherlands. Contact me for more information and/or bookings.
———————————————————————————————————————————
Welkom bij Cuisine d’Eli. Ik ben Elizabeth: duurzame kok aan huis en cateraar. Meer weten? Neem gerust een kijkje op de rest van mijn website of neem contact met me op voor meer informatie.

very nice post
LikeLiked by 1 person
thanks 🙂
LikeLike
wahoo lovely post thanks for sharing
LikeLiked by 1 person
Thanks, you’re welcome!
LikeLike
nice article about the pickle making and fermentation and other things fermentation
LikeLiked by 1 person
Thanks! 🙂
LikeLike
Good article, Thanks for post
LikeLiked by 1 person
Thanks! You’re welcome :).
LikeLike
Great share!
LikeLiked by 1 person
Thanks for Sharing.
LikeLiked by 1 person
You’re welcome! Thanks for dropping by.
LikeLiked by 1 person
Great share, thanks !
LikeLiked by 1 person
You’re welcome, Megala!
LikeLiked by 1 person